Objective
Upon being given addresses for several sand mines in Wisconsin from the DNR, the goal of this lab was to be able to normalize the data table of addresses, geocode the mine locations to a map, and check for error by comparing the geocoded locations with other classmates and the DNR's geocoded locations. Because not all addresses were given in the same format, we used different methods to geocode the mines. One big difference was between finding mine locations with street addresses versus locating mines with PLSS addresses.
Methods
The first step in geocoding the mines was to normalize the data table of addresses. To do this, first gathered all the addresses that I was assigned to from a master list of addresses. I then separated all address elements such as PLSS, Street Name, City, and State into separate columns.This was necessary for ArcMap to be able to appropriately and more accurately locate the mine addresses by matching the elements of the locations separately. The Figures below show the original format of the table containing all addresses (Fig. 1) and the format of the table containing the addresses for this lab (Fig. 2). Note the "Address" attribute of the original table is broken into "PLSS," and "Road," and the "Town/City/Village," is separated into "Town," and "City" attributes in the normalized table.
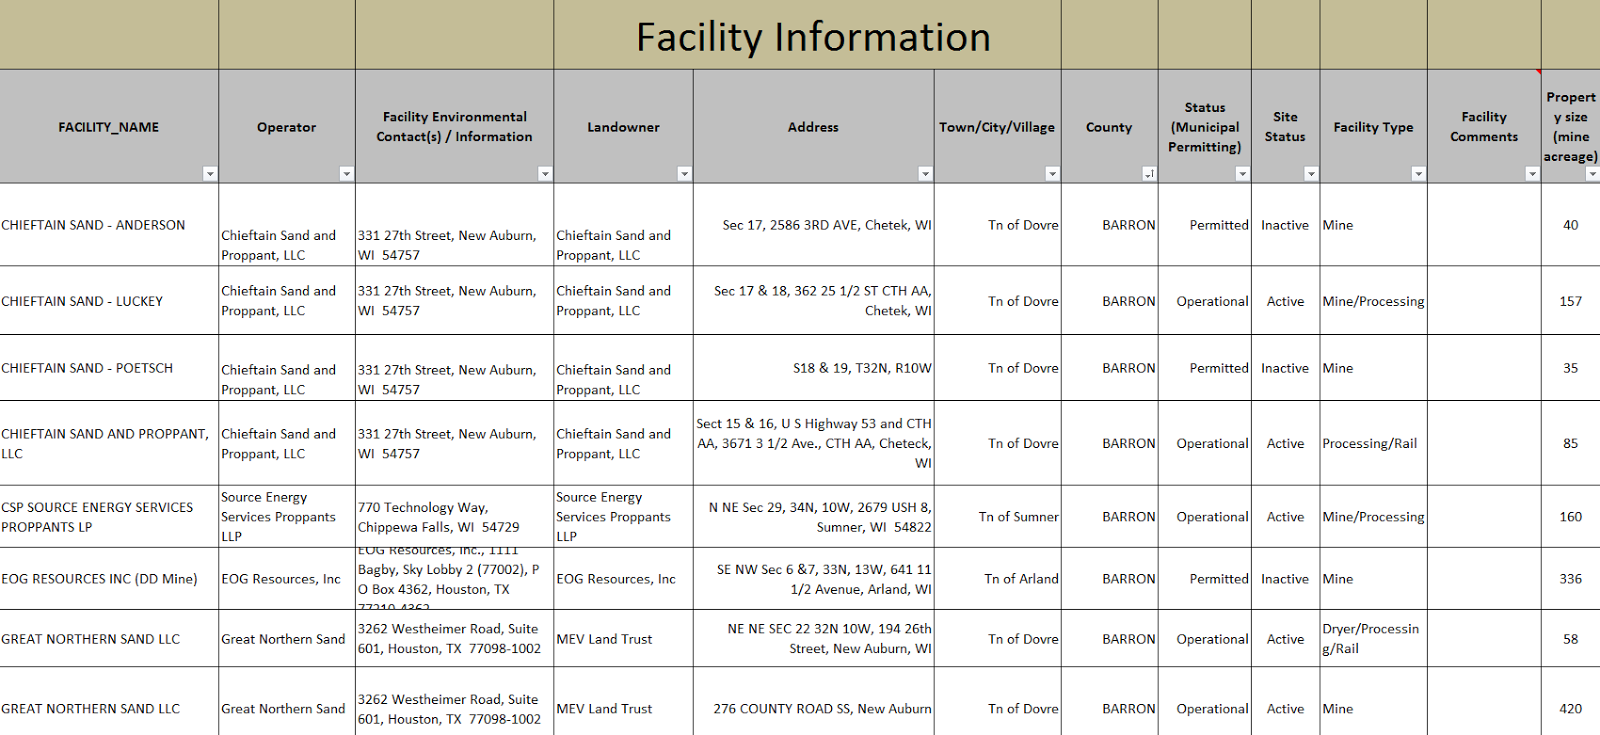 |
| Fig. 1: Original format of the address data table before normalization. |
 |
| Fig. 2: Data table format of addresses after normalization. |
After normalizing the table, I then imported my table to ArcMap to begin gecoding using the Geocode Addresses tool and World Geocode Service as an Address Locator. When the Geocode Addresses tool was finished matching addresses from the table to the map, I used the Review/Rematch Addresses tool on the geocoding toolbar to determine the accuracy of the matches. I used status and score to determine if I needed to manually geocode an address. If the status was "Tied" or "Unmatched," I needed to locate the address manually and use "Pick Address From Map" to create a match for that mine (Fig. 3). I would not accept any match score below 90%, though it was only necessary to accept matches above 85%. This ensured a greater accuracy of the data. Several addresses were unmatched and tied at the start of the review/rematch process and two locations were matched with low scores. For matches below 90% score and "Tied" or "Unmatched," I used google earth to type in the address of the mine and show me the area where the mine should theoretically be and to help locate the mine on the basemap on ArcMap. For PLSS locations, I used the PLSS data from WiDNR2014 database and an SQL for PLSS name to locate the area in which the mine resided. I then searched the PLSS area to find the mine and then used "Pick Address From Map" to create a match for the mine location. I did this until all mine locations were matched with a score above 90% (Fig. 4). All locations were matched with a score of 100% save for one location automatically matched at 94.61%.
 |
| Fig.3: An example of a matched mine location . The address location is symbolized by the green dot at the beginning of the driveway of the mine. |
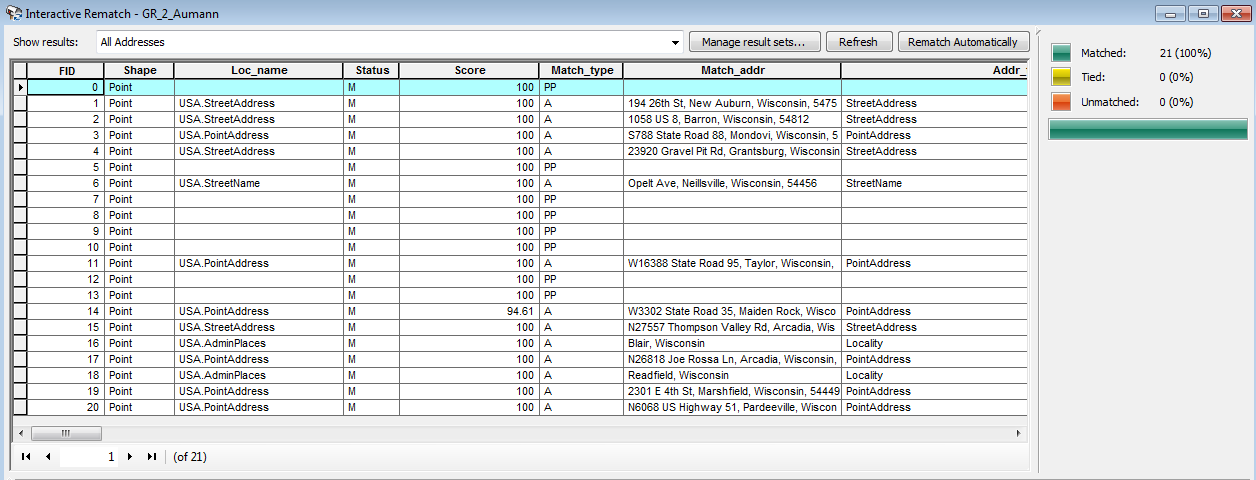 |
| Fig. 4: Review/Rematch Interactive Window showing completed Review/Rematch process with a 100% match rate. |
After editing the mine locations in the Review/Rematch interactive session, I exported my mine locations as a shapefile and uploaded them to a shared folder for my classmates to compare locations with. I then uploaded my classmates shapefiles and the geocoded locations from the DNR and brought them into ArcMap. I merged the files of my classmates and my mine location file using the Merge tool in Data Management and left the DNR mine location file unaltered to compare my locations with the DNR and the class separately. I then wrote an SQL expression to select out the Mine Unique ID's that matched the Mine Unique ID's I had previously geocoded (Fig. 5). I saved the SQL expression to be able to load it into another SQL window easily instead of typing it again. Since the expression was lengthy, this saved much time. After selecting the similar Mine ID locations, I created a new layer from the selected features for both the DNR's actual locations and my geocoded mine locations.
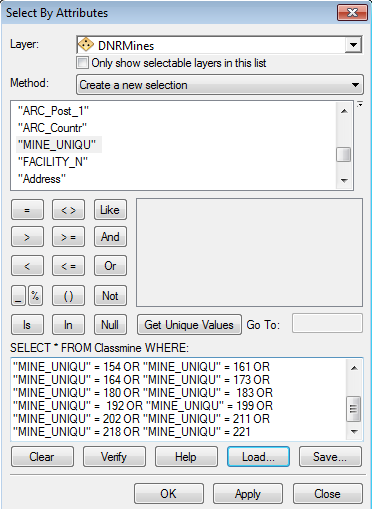 |
| Fig. 5: SQL Expression to select Mine Unique ID's that were the same as the Mine Unique ID's I had previously geocoded. |
I then used the Generate Near Table tool to calculate the distance between the points in my mine locations and my classmates locations(Fig. 6) and between my mine locations and the actual locations from the DNR (Fig. 7). To find the amount of average error, I summarized the table's near distance attribute to get an average distance between the locations of each feature class. This is discussed in the Results section.
Results
8 of the geocoded mine locations matched perfectly with the geocoded mines of my classmates while only 5 of my geocoded mine locations matched the actual mine locations given by the DNR (tables in Fig. 6 and 7). The summary of distance showed an average distance between my mine locations and the classmates was 0.012048 and an average distance between my mine locations and the actual locations was 0.036308. I was closer to my classmate's geocoded locations than the actual locations given to us by the DNR.
  |
| Fig.6: Distance between my mine locations and my classmates. |
 |
| Fig. 7: Distance between my mine locations and their actual locations from the DNR. |
Discussion
There are many reasons for spatial discrepancies in geocoding processes. Below is a table of error types and examples from Lo, chapter 4 (Fig. 8). In this geocoding lab, I experienced many operational errors such as field measurement confusion on which driveway to match to the address when there were multiple driveways for one mine. One example of inherent error that may be an influence on the spatial differences between geocoded mines and the actual locations is the aging of the map. Frac Sand Mining is a rapidly growing business and satellite imagery is not able to keep up. In some instances, mines could not be found in their supposed location and an estimate had to be made.
 |
| Fig. 8: Error types and examples from Lo chapter 4. |
One way to know which geocoded points are correct is to rank the points and give more weight to those that have come from a reputable source, such as the DNR. You can also check the points across multiple sources of data such as we did in this lab when comparing geocoded mines with classmates.
Conclusion
Geocoding can be an important step in spatial studies as it allows you to locate addresses that have not yet been added to a map. In a study such as the frac sand mining study we will be continuing with this semester, geocoding is needed when the industry is growing at a fast rate. I now have a greater sense for the importance of table normalization and obtaining accurate data. After completing this lab, we now have the locations of mines in Wisconsin to continue our study on Frac Sand Mining in Western Wisconsin.
No comments:
Post a Comment